Monday, May 30, 2016

Legions of the Massacre

Here is the relevant information about which forces belong where.  


Legion
FactionPlayer
Notes
I
Dark AngelsImperialistShadowolf
Paladin

III
Emperor's ChildrenSecessionistRob


IV
Iron WarriorsSecessionistOnyx


V
White ScarsImperialistChops
Khorne
VI
Space WolvesSecessionist


VII
Imperial FistsImperialist
Secessionist
Lachdannan
Lord Pants


VIII
Night LordsImperialistScotsman
Nurgle
IX
Blood AngelsSecessionist

Unfavoured

X
Iron HandsImperialist
Ironknight
Frosthammer

Tzeentch
Tzeentch
XII
World EatersSecessionist

Slaanesh
XIII
Scions of GuillimanSecessionistSteelesamurai


XIV
Death GuardSecessionist


XV
Thousand SonsImperialistSanguis


XVI
Luna WolvesSecessionist


XVII
Word BearersImperialist


XVIII
SalamandersImperialistTiges
Paladin

XIX
Raven GuardSecessionistLastakodo
Unfavoured

XX

 -

Alpha Legion

Mechanicum

Unaligned

Martian
Mechanicum
Ratt

Chops
Lastakodo

Untrusted


 Factions
Imperialists- the Legions of the Dark Imperium and its Emperor
Secessionists- the Legions of the Warmaster fighting for Imperium Secundus
Martian Mechanicum- the Independent Empire of the Mechanicum of Mars
Unaligned- Due to their actions and seemingly fickle and random changes Unaligned forces are independent to the greater powers.


 Notes
Paladin- An order of Imperialist Legions that refuse to deal with darkness and daemons.
-Paladins may never use Daemons, Maleific Daemonology psychic powers.  They also receive a free Astropath (rules will be provided and linked to in a future post) which they must take.
Followers of the Chaos Gods-  The Legions with the name of a Chaos God next to them are followers of that god.  They have a Cult unit dedicated to that god and may take Daemon allies that are  aligned with that god.
Unfavoured- These Legions were cast out of the Imperium by the Emperor's command and can never again be Imperialists
Untrusted- These forces have by choice or by their actions turned away from everyone else seeking their own agenda.  In games they may choose to play as either Secessionist or Imperialists.  In multiplayer games after sides and points have been decided they may choose which side to join, although they may attack and be attacked by any force on the table.
Blackshield armies are also considered Untrusted

Allies
We will be using the Secession Allies chart show below rather than the Allies chart in the Forgeworld Horus Heresy books. (note the Thousand Sons should swap the status of the Raven Guard and Salamanders, this will be corrected when I have time).


Wednesday, May 25, 2016

Dissent in the ranks Campaign - Wrath of Dorn

Well, it finally happened. Finished the last game of the 30k campaign started over a year ago. If you would like to go back to the beginning of this journey, click here.

This game was a 1000pt Zone Mortalis game set in an alternate 30k universe. Some Imperial Fists have separated from Dorn, and are intent on joining the secessionists, along with Polux. Sigismund was the main man fighting them, and won enough games to warrant Dorn's attention. This last game is Dorn finally coming to the piece, and exacting so good old fashioned retribution.

This game uses the Space Hulk tiles to represent an underground base. We used all the ZM rules, other than the cold void rules as that didn't make sense due to the stable atmosphere of this subterranean base. Otherwise, we used the rules I have used previously here. It was also decided that all models and units would be fearless as my forces, led by Dorn, are hellbent on destroying the foe and will not give up While the rebel Fists have no where to run to, other than the exit.

For this game I got Dorn for free (pretty sweet), and my friend got a 10 Veteran tactical marines with Stubborn, plus any other upgrades for free.

Here are the army lists (as much as I can remember)

Loyalist Imperial Fists (1000pts)
Primarch's Chosen RoW

Dorn (free)

Primaris Medicae
Artificer Armour
Solarite Power Guantlet

5 Templar Brethren
Combat Shields
Solarite Power Guantlet

Apothecary 


7 Huscarls
Power Sword
2 Chainfists
Power Maul
3 Thunder Hammers

10 Veteran Tactical Marines
2 Heavy Bolters with suspensor webs
Sniper


 Veterans plus medic
 Dorn leading the Templar Brethren, with the Primaris Medicae.
 Solid Huscarls again lend their aid.

Secessionist Imperial Fists
Pride of the Legion RoW
Praetor
Cataphracti Terminator Armour
Storm Shield
Paragon Blade
Digi Lasers

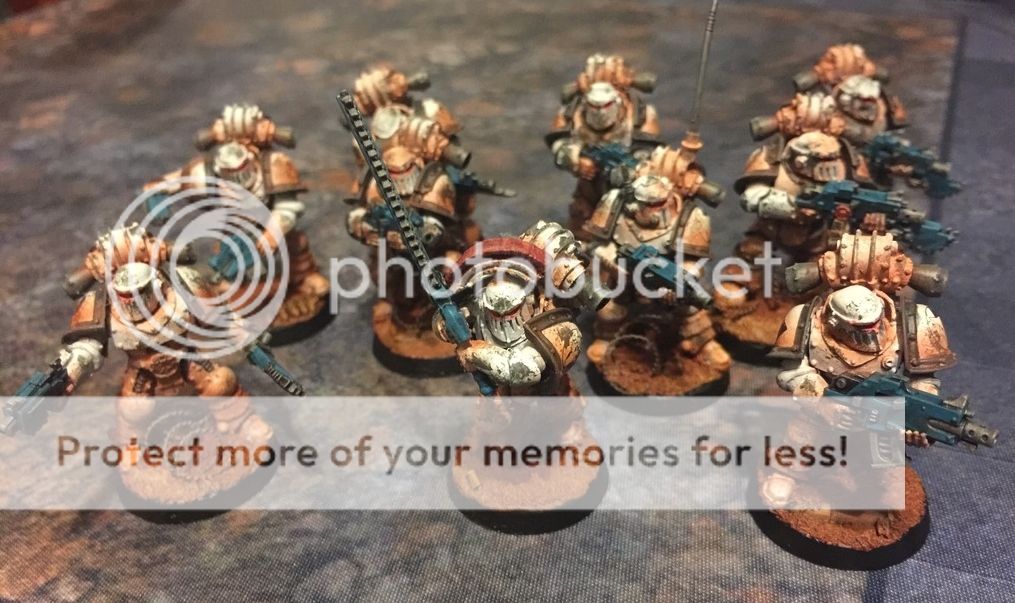
Sons of Guilleman Veteran tactical Squad (free)
Missile Launcher with suspensor web

5 Terminators
Tartaros Terminator Armour
Assualt Cannon
Power Sword
3 Storm Shields and Thunder Hammers

10 Veteran Tactical squad
Sniper

Apothecary

5 Veteran Tactical squad
Heavy Bolter with suspensor web
Sniper


5 Veteran Tactical squad
Sniper


The Game
Having played a game before hand that was quite one sided, we changed the deployment, so only the Sons of Guilliman were deplyed in the starting area, with the rest of the rebel Imperial Fist forces deplyed around the facility to help them escape. The loyalists who made it to the facility, were deployed in a flanking position on both sides, so the SoG would have to be quick to outrun them.

Objectives
Loyalist Imperial Fists were to primarily eliminate the SoG squad, if done, then game won and campaign ended. If not done, then secondary objectives would be victory points and gathering intel represented as dice in certain locations on the board.

Secceionists were to get the SoG to escape off the board to the left, if done with 5 or more marines, then that is a win for them, and there would be another campaign game after. Secondary objectives would be victory points.

I kept to tradition and failed to sieze the initiative (I can't remember the last time I had first turn...)


 Secessionist Turn 1
 All the units move out as you can see, with the veteran units close to Dorn, making sure they had some good firing lines, and that it wouldn't be an easy charge (it was ruled early on that units could charge around corners).

Loyalist Turn 1
Dorn and the Templar Brethren (with Primaris Medicae in tow) rush towards the large unit of veterans, hoping to eliminate them early. The Huscarls and loyalist veterans just moved as far as they could. With no shooting, Dorn charges at the veterans, with them succeeding in inflicting 2 wounds with their sniper shots!
Dorn and the Templar's then wipe them out, consolidating towards the smaller 5 man vet squad with the Heavy Bolter.

Secessionists Turn 2
Everything that can more, moves as far as it can, with the praetor providing the precious squad some padding. The 5 man vet squad near Dorn, falls back, and opens up, causing another wound to the primarch!

Loyalist Turn 2
Dorn rushes and wipes out the demi squad of veterans, and took the intel in the room to boot. The Huscarls move close to the center passages, whereas the other veteran squad takes some pot shots at the 5 man enemy vet squad near the,, and then roll snake eyes for assault.

Secessionist Turn 3
 Lots of action this turn. The secessionist terminators charge the Huscarls, the demi vet squad shoots up my veteran squad, killing 3 marines plus the medic with a precision shot. The praetor then charges in, tanking all the shots, and gets into combat with them. The SoG sqaud advance along the center passage, free from obstruction.
The assault did not go well for the loyalists. The terminator fight was 1 killed each, though I proved again that 2+ armour saves are easy to fail. The praetor annihilates the veterans, with only the heavy bolters left to hold him up with their lives.

Loyalist Turn 3
Dorn and his squad charge the enemy terminators in an effort to free up his Huscarls. Combat ensured that there was still 2 enemy terminators left, now holding up my whole army. The veterans against the praetor was very short lived.

Secessionist Turn 4
 Deciding to go for a gamble, and take the quick way, the SoG run past the big melee, with the praetor and demi squad moving up in support, to get close to the action. His 2 remaining thunder hammer, storm shield terminators needed to hold up my forces for one more turn and it would look very favourable. Despite their heroic actions, they all fell to the mass attacks, and Dorn, along with all his remaining forces, consolidated towards the main objective.

Loyalist Turn 4
 Dorn and the Templars move up to the door and open it to see their objective running along the corridor. The Huscarls go around the other way, to head them off.
 All of the loyalist forces charge the objective squad...
...they manage to kill a Templar, but are wiped out for their trouble. With the main mission complete for the loyalists, the game comes to an end.
The remaining forces scatter before the titanic fury of the primarch!

So the last game of the campaign turned out to be a loyalist victory. It was good to finally wrap up the campaign, and Dorn is now firmly on the loyalist side for the rest of the campaign.

It was an enoyable mini campaign and it was good to finally use that primarch model, that I have had for many years.

Thanks for looking.

Cheers!

Friday, May 13, 2016

Imperial Fists Army Showcase

Below is Liam's the gorgeously painted and converted Imperial Fists.  One of the two Imperial Fists forces taking part in the Ultramar Secession.

 The Imperial Fists have found themselves with an internal power struggle that has split the Legion.  The Imperialists under the charge of Sigismund strive to defend the Emperor and Imperium they are sworn to protect against the Secessionist Imperial Fists under Alexis Pollux.  See more the Dissent in the Ranks mini-campaign.

Liam recently did an army photo his Imperial Fists over on his blog , Ærgewinn definitely worth checking out if you get a chance!

There are a few more pics and close ups of the whole army view on his blog which you can check out clicking the link above.  Instead I'll add a few pics of the army from elsewhere in his blog.
Veteran squad each with their own unique heraldry

The converted up Fellblade "Eldelweis"  not sure why this didn't make it into the army pic but it is too awesome not to be shown off!
 
The Man himself Rogal Dorn and his lovingly converted Huscarl terminator bodyguard. 

This is the first and hopefully not the last Army Showcase that we'll see for the Ultramar Secession.  If you have a preference for which army you'd like to see next let me know and I'll see if I can't get a showcase done for it!

Thursday, May 12, 2016

The Grand Battle of Forgeworld Sarum

As Guilliman's Imperium Secundus spread across the former Ultima Segmentum of the Imperium of Man more and more worlds turned to the benevolent rule of the Warmaster, rather than the uncaring rule of the distant Emperor of Mankind.  Not all worlds joined the Imperium Secundus so willingly however.   Many often vital worlds had to be brought to heel, shown the might of Guilliman's empire  before enjoying the benefits it brought.
The raging Battle for Mars and the reunification of the Dark and Sundered Mechanicum into a singular independent entity, the Martian Mechanicum, demonstrated to all the importance of shoring up their supply lines.  In light of these events Guilliman ordered the attack on Forgeworld Sarum.  Not willing to let such a vital asset fall into the hands of the Warmaster, Magnus the Red, Primarch of the Thousand Sons sent a force of his own.  Thus began the Grand Battle of Forgeworld Sarum.

The first battle of Sarum saw 2 knightly households take up arms alongside the Ordo Cybernetica and Skitarii Legions in defense of the forgeworld.  Arrayed against the Mechanicum forces were a combined force of various Imperialist Legions and Militia units and even Freeblade Knights. 

Such were the vast numbers sent by Magnus that they were easily able to outflank the smaller tighter spearhead of the Knights formation.

The Skitarii hold the line as the Knight households rush forward to meet the well dug in Imperialists.

As the 2 Knightly Households push into the Imperialists a second larger force of Secessionists attacked elsewhere in the Mechanicum's defense line.  The additional forces require the deployment of a fearsome Reaver Titan, supported by yet more knights from the two households.

Already hard pressed by the Imperialists the Mechanicum forces choose once again to marshal their strength on a narrow front, yet again being outflanked by the massively numerically superior Secessionist forces.  

The second battle of Sarum pits the Collegia Titanica, Knightly Households and a much more limited number of Skitarii and Cybernetica cohorts against the assembled Legions of the Secessionists and various Militia forces from across the fledgling Imperium Secundus, under the command of the Ultramarines.

The mighty God Machine unleashes its righteous praise to the Omnissiah in a swirling Maelstrom of death and destruction wrought by its many devastating weapons.  Beneath the Titan's gaze the Knights set to their enemies.

The Secessionist forces unleash a withering hail of firepower as their superior aerospace assets dominate the skies.

Although few in number the Mechanicum forces wield devastating weaponry making each warrior more than a match for even the mighty Legionnes Astartes


The focused fire of the Secessionists is able to bring the mighty Reaver Titan low!  The concentration of fire did leave relatively little fire being brought to bear on the Knights however, who caused staggering losses on their enemies.

The blasted ruin of the God Machine of the Collegia Titanica even in its death throws managed one last act of spite crushing a Militia Baneblade beneath its colossal form!
A Militia heavy weapons trooper surveys the cataclysmic scene unfolding ahead of him.  if these are not mankind's darkest days he ponders what could still be to come?

This was yet another report that I completely forgot about (I think that is the last of the forgotten battles).  Details are roughly as I remember them and what I could gather from the pictures (of which there aren't as many as I'd like).  Some details weren't really important to add given the pictures above but I'll add here for interests sake.
-The Imperialists/Secessionists could outflank 1 super heavy and 3 tanks per turn
-The Imperialists/Secessionists had unlimited respawns of tanks and super heavies (I think it was only those) and infantry for their trenches so long as the trenches had any infantry in them.
-The Reaver Titan got killed in turn 1 or 2 in the second game so it got to respawn too (since some tool forgot to bring it on day 1)
 -All vehicles doubled any form of movement they could perform so we could better make use of the 12' long (I think) table.
-The game was meant to be a spectacle so no real winner could be determined although it flt pretty balanced with crazy fast knights vs unlimited tanks and super heavies
-Originally the game was meant to be Knights vs Superheavies, but a few players dropped out at late notice leaving us with a severely reduced number of super heavies.  Hence the respawns.

Sunday, April 17, 2016

Battle of Solis Planum

The Battle of Solis Planum was a colossal battle on Mars that saw both the Secessionists and Mechanicum simultaneously attacking the last major holdings of the Imperialists on Mars.

Defending the center the Imperialists were composed of Thousand Sons, Salamanders and Iron Hands with supporting elements of Solar Auxilia, Imperial Fists and some renegade Emperor's Children. 


Attacking from the north were the forces of the Mechanicum.  Comprising of a Reaver Titan of the Legio Astraman and attending Knight House, Skitarii Legions, a considerable Legio Cybernetica cohort and a small force of Raven Guard. 

From the south cam the Secessionists composed primarily of Iron Warriors and Imperial Militia, lead by a contingent of Ultramarines and supporting elements of the Alpha Legion.

The Salamanders and a small contingent of Iron Hands Held off the Mechanicum in the north.  Vulkan and one Iron Hands Veteran Tactical squad destroying almost all of the Knight Titans, all the while the Reaver Titan bombarded Vulkan whilst all watching saw him walk unscathed from the God machines hellish firepower. 
The bulk of the Iron Warriors, Thousand Sons and the supporting Imperial Fists and Emperor's Children tried to sally forth in the south smashing into the Secessionists whilst the Reaver randomly bombarded both sides from afar.
The defence in the center was disrupted somewhat with the Raven Guard dropping virtually their entire force in the middle of the defenders throwing their defence into disary. 

Ultimately the defence held, with Imperialist forces taking massive damage but seriously bloodying the noses of the Mechanicum and Secessionist forces.

Due to this game having taken place some time ago, and me only having 4 pics and my terrible memory to work off of I will give a few highlights I remember.  If people have any fond anecdotes they want to add in then please do so in the comments below.

Here are a few of my highlights:
-The Raven Guard Moritat being killed by the Scattering Raven Guard Deathstorm Drop Pod, before he had fired.
-Vulkan surviving every shot the Reaver fired his way and merrily beating down Knight Titans.
-The Defenders leaving their entire center open with a Raven Guard Drop Army waiting on the wings.
-1 Iron Hands Veteran Tactical squad killing 2 (or 3 I forget) knight Titans in close combat and only losing less than half the squad total.
-The crazy amount of armoured firepower that the Secessionists had.
-The Secessionist hill well away from the front line ,with the Ultramarines command squad and Lascannon toting Iron Havoks on it getting bombarded into oblivion by orbital bombardment (2-3 orbital bombardments I think).
-The crazy number of Dreadnoughts on the table (from the pictures I can see 29 but I think there may have been a few more)

Friday, April 15, 2016

Tides of War


Luna Wolf Deployment

Imperial Fists Deployment

The Knights and Luna Wolves advance, Artox performs true to form buy targeting the Spartan Victory with his Thermal Cannon, only to realise that between its Armoured Ceramite, Flare Shield and the range he was completely unable to harm the mighty tank.  The rest of the army's fire was just as lackluster and resulted in nothing more than some scorched paint!

Thin Imperial Fists mighty tanks backed up in an attempt to buy more time for their fiercesome firepower to do its work.  Brilliant beams of focussed light burst from their many Lascannons severyly damaging Artox' Errant and the Styrix!  The Knights on the other hand powered up the left flank.  The Hawkshroud Errant thought to finish off the Styrix with its own Thermal Cannon but once again a Flare Shield was the undoing of a Thermal Cannon, not the best day to be a Knight Errant!

Having failed to cleanly cross the cratered ground the Hawkshroud Knights are blasted with Thermal Cannon, Volkite Chieorovile and Graviton shots, before being smashed into with the combined fury of 3 Knights!  This was about to get messy!

The Hawkshroud Seneschal faced off both Artox' Errant and the Styrix Arbalester, and completely missed his attacks!  Artox swung back in an amazing display utterly unlike any he had ever performed and smote the Seneschal!  Surely he would be promoted to Scion Marshal for this mighty deed.  As Artox celebrated his mighty strike he watched the Styrix Arbalester engulfed in the catastrophic fireball unleashed by the demise of the Hawkshroud Knight.  Only for the Styrix to also Explode! smashing aside the nearby shipping containers and crushing a few Luna Wolves too.  Letting out a defeated sigh Artox awaited the Seneschal Lancer's next furious lecture.

 The Acheron Preceptor meanwhile demonstrated the correct way to dispatch a honourable foe, who seemed just as adept in the Hawkshroud art of close quarter fighting as the Hawkshroud Seneschal, without getting a team kill in the process.

  The Imperial fists having seen their Hawkshroud allies cut to ribbons were none to impressed.  Virctory rumbled forward quadlascannons blazing whilst Praetor Adalwulf, Primus Medicae Omni and the Huscarls ran headlong into Artox.  Once again in a display quite unlike his normal actions Artox slew 3 of the Huscarls.  The remaining Huscarls tore the Knight's legs off and 2 were promptly crushed as the top half of the Knight came tumbling down. The Land Raiders Indomitable and Dauntless poured fire into the Lancer Seneschal doing only minor damage as the Knight and Luna Wolves closed in.

The end is nigh, the Knights rush in destroying the Dauntless and felling Adalwulf, Omni and the last Huscarl. 


Meanwhile the Luna Wolves rushed in the Destroyers making short work of the Spartan Victory with their meltabombs.  The Reavers on the other hand politely knocked on the Indomitable's hull with a powerrfist as they had forgotten to bring any meltabombs.

 The Imperial Fists Tactical squads hop out and open fire in a desperate attempt to turn the tide.

The dreaded el Fisto and his squad open fire on the Reaver Attack squad, a ferocious fusillade of firepower that kills a single marine,  apparently Luna Wolves power armour is crazy good.  Tactical Squad 1  opens fire on the Destroyers and is similarly ineffective!

Laughing off the bolter shells detonating harmlessly off their power armour the Tactical squad, Destroyers and Acheron blast Tactical Squad 1 before the Destroyers launch in to the attack, and are promptly beaten back!  The one surviving Destroyer clearly thought his job in this battle was done as he legged it never to rally.

At the other end of the battle the Reavers and Lancer charged el Fisto's squad, wanting to guarantee the meddlesome Sergeant would cause no havoc.  El Fisto promptly challenged the Chaplain and was beaten down by the Luna Wolf, who clearly hadn't heard of, or didn't care about the legendary sergeant.  The Reavers then proceeded to butcher the remaining marines whilst the Lancer watched.


The last 3 Tactical marines can't help but feel something terrible is about to happen as they fire at the fleeing Destroyer.

Being the stubborn and resolute warriors they are, it was at this point the Imperial Fists conceded that this might not be going to plan.  The day was over, except for a bit more bloodshed and screaming.


Victory for the Knights and Luna Wolves!

The Mission was Dominion, from Betrayal with Hammer and Anvil deployment.

We had 3 objectives (all mid-field) worth 3pts each, Slay the warlord, First Blood, Attrition (extra victory point if you destroy more enemy units than your opponent).
In addition everything except Independent Characters, Flyers and Dedicated Transports were scoring.


The armies were Liam's Imperial fists with Quistoris Knight allies vs my Questoris Knights with Luna Wolf Allies.

Imperial Fists, and Knight allies
Praetor Adalwulf and Primus Medicae Omni

The Huscarls

The Land Raider Spartan "Victory"

el Fisto and his Tactical squad

Tactical squad 1

The Land Raiders "Dauntless" and "Indomitable"

The Quistoris Knight Paladin Seneschal

The Quistori Knight Errant Scion Marshal

The Knights and Luna Wolf allies
Cerastus Knight Lancer Seneschal

Questoris Knight Scion Aspirant Artox (aka fail knight)

Cerastus Knight Acheron Preceptor (with its top off)

Questoris Knight Styrix Scion Arbalester

Luna Wolf Chaplain and Reaver Attack squad


Tactical Squad

Destroyer Squad